
Having recently bought an Icom 7300 and being very pleased with it I decided that I wanted to be able to use it when I was away from home, either at work or whilst travelling for work and I guess one day maybe a holiday again (yeah I'll believe it when I see it!). Icom sells a software solution to enable owners to do this which is called RS-BA1. I know there are other solutions for this but the reviews of the RS-BA1 software that I'd seen online looked very good and it didn't seem to suffer from high latency. Martin Lynch and Sons sell the software for £99.99, personally, I think that Icom should give the software away with the radio but hey I guess that's the commercial world that we live in. I'd class myself as a technically competent person with computers and didn't really expect to have any problems setting this up, well serves me right for being big-headed!
Firstly, you install the software on the PC that the rig is connected to at home which will be used as the server. If I had the 7610 this wouldn't be necessary as the 7610 has a built-in server which would just need an ethernet cable with a working internet connection connecting to the back of it. No such luck for me but I have a small low power Windows PC which I use in the shack for logging and for digital modes like FT8. It's the same software that you install for the server that you would on the client PC so the process is the same for both my shack PC and my laptop. The installation consists of two components, the remote utility and the RS-BA1 software the latter being software shown in the screenshot above. You install this like any other Windows application and select the default settings, installation was uneventful and straight forward for me. Once this is done you need to open the remote utility and click on the "options" item at the top of the screen and then click "local/server settings". This brings up a new window, click on the "add" button at the bottom of the window. This brings up yet another new window where you can register a new radio, here it asks you what the purpose of use is going to be and here you will need to select "Accessible from other PCs".

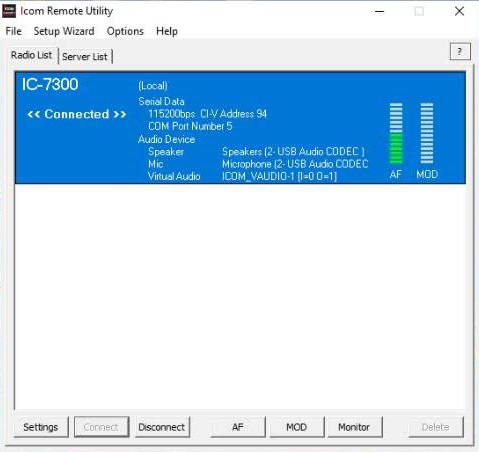
Now, your rig is connected to your PC and it's powered up you should see the radio and connection information in the box next to the USB radio button, if not click on the "search" button.

When you click next the window changes to the CI-V/COM port setting window, you need to match the CI-V address of your rig and the Baud rate, in my case 94 and 115200. Now, you could set the Baud rate to auto here and have it set to auto in the rig but I found that if you do this you can't get the "scope" waterfall display to show on your remote computer

The next window is where you set a username and password and the role for the user.
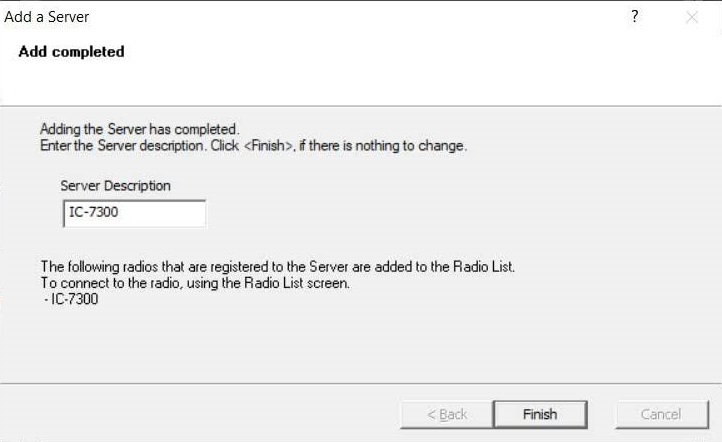
When you click next it will ask you to set a name for the radio and will have pre-filled it with a suggestion which you can keep or change as you like.
Choose a name for the rig, I chose IC-7300 for mine. Now you need to click on the "connect" button and you should see <<Connected>> against the radio. If it's not showing this then there's something not right with the settings.
Remote PC installation
Install the software the same as before and when it's fully installed open the Remote Utility app
Click on the "server list" tab and then the "add" button. 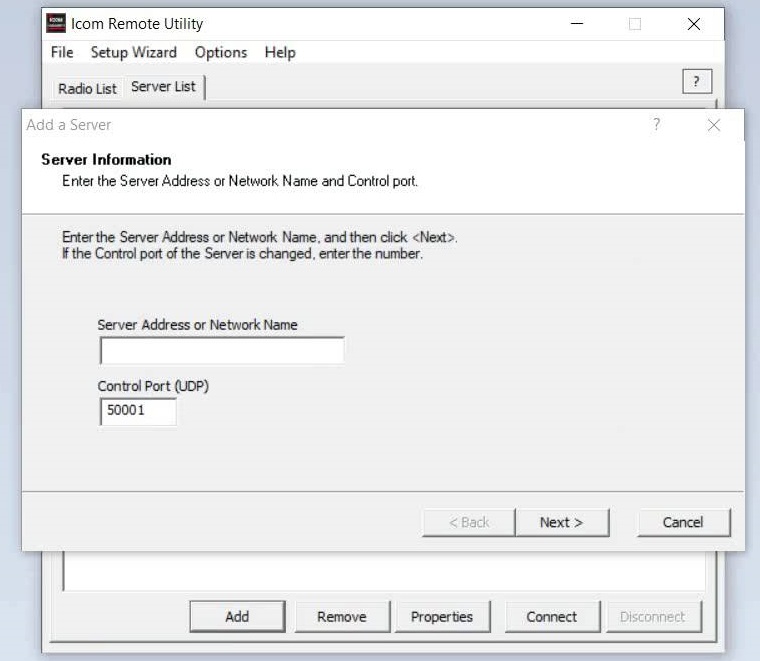
Now I would recommend that you first test that this is going to work from within your home network by entering the IP address of the computer that you've got the server running on, in this case, my shack PC with it's fixed IP address of 192.168.0.10. Make sure that the control port matches the server PC, I changed both of mine to 60001. Click next and you're then asked to enter your username and password for the remote PC which is what you would have set in the previous section.
Click next and fingers crossed you will have been successful and are now being asked what you want to name your remote rig server.
I've been really original and called mine the model number of the rig.
Phew, nearly there! Bare with me....
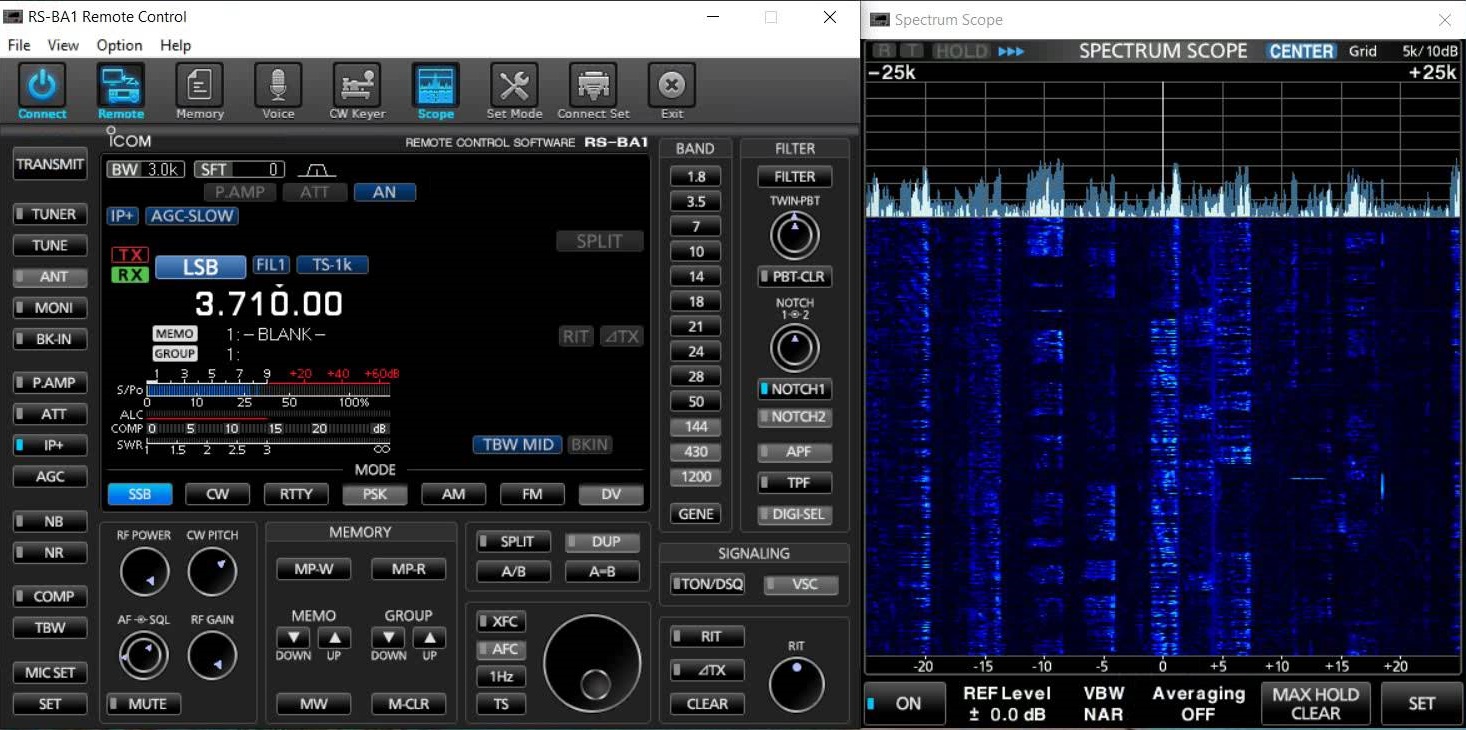
Open the RS-BA1 software and in the toolbar at the top of that application select "Connect Set" button.
You need to select the radio model number from the drop-down list and this bit is very important if you want to use the waterfall scope, select the connection as USB rather than REMOTE. You need to match the COM port with the Port in the Remote Utility app on the information displayed in the radio list for the radio that'd connected. Set the Baud rate to match too and to make the scope function work the Baud rate needs to be 115200. Set the radio CI-V address to match too and then the CI-V address for the RS-BA1 software.
Hopefully, now when you press the OK button and then click the "Connect" button your radio should open and you should hear sound, provided that the audio is turned up that is. Then click on the "Scope" button, all being well it should appear and the waterfall display should start. Et. Voila! Success!
Now to use the rig away from home you will either need a fixed IP for your home broadband that you can substitute in the software or you can use a dynamic IP address service to point an address like g7wjw.noip.com to your home broadband IP address and you can have an updater app running on your server PC to keep the address up to date.
In your home router you will need to set up port forwarding rules to forward the port range 50001 to 50003, if you left the ports at the default settings, to your server PC IP address. You should then be able to take your computer away from home to try it out. Thanks to Costa coffee for the coffee and the use of their internet connection.